Ever strolled through an art gallery and thought, “Wow, that’s stunning—but also, wow, my wallet’s crying”? Yeah, me too! But guess what, darling? You don’t need a millionaire’s bank account to have walls that scream chic. Get ready to channel your inner Picasso, because I’m about to dish out five fabulous, budget-friendly wall art DIYs that’ll make your friends think you hired an interior designer. Grab your glue guns and paintbrushes, and let’s get crafty!
1. Paint Chip Mosaic Masterpiece
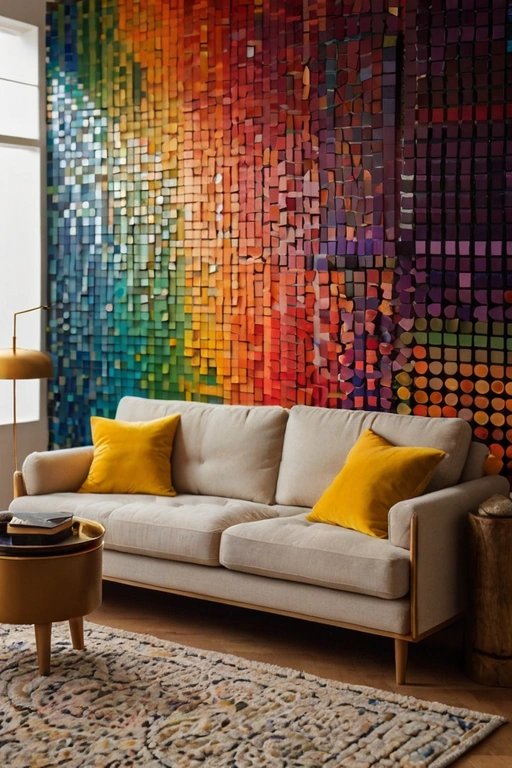
Ready to turn the mundane into the magical? Head to your local paint store and pick up some free paint chip samples. Go wild—grab every color that makes your heart sing! Once you’re home, cut those bad boys into different shapes and sizes. Arrange them on a canvas or cardboard in a mesmerizing mosaic pattern. Glue each piece down, and voila! You’ve got yourself a budget-friendly wall art piece that looks like it cost a fortune.
Who needs traditional art when you can create a kaleidoscopic wonderland right in your own living room? Plus, it’s a fabulous way to experiment with colors without committing to painting your walls.
2. Leafy Green Botanical Prints
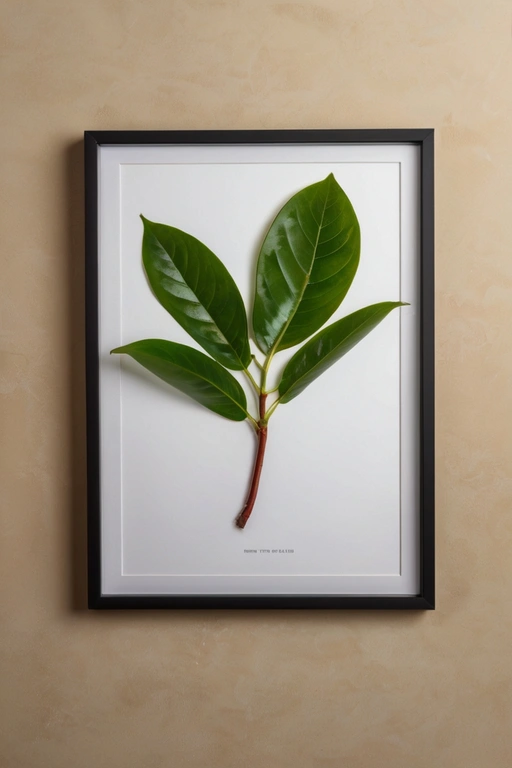
Got a green thumb—or at least a green heart? Collect some leaves from your backyard (or local park, no judgment here). Press them between the pages of a hefty book for a few days until they’re nice and flat. Now, grab some watercolor paper, and either tape or glue the leaves down in an aesthetically pleasing way. Pop that paper into a thrifted frame, and boom! You’ve got rustic, botanical prints that bring the outdoor charm indoors.
It’s like Mother Nature gave your walls a little kiss. And the best part? It’s practically free and totally customizable based on the season or your current leaf obsession.
3. String Art Sensation
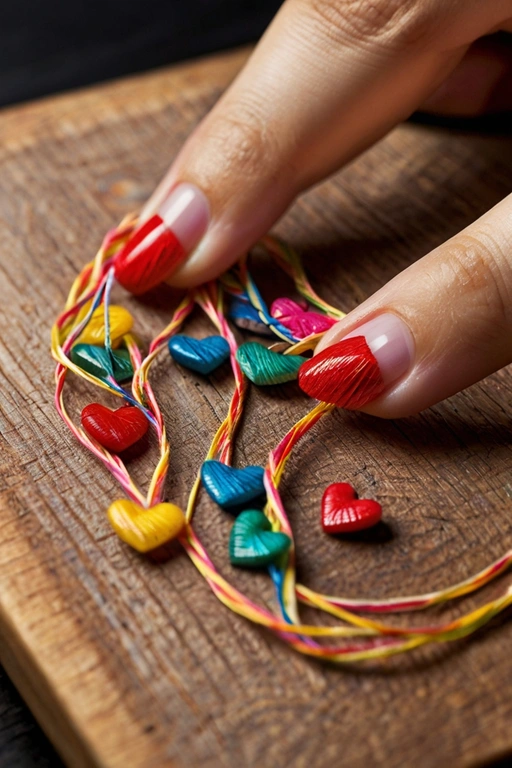
Remember those string art kits from childhood? Time to relive the glory days—but with a grown-up twist! Grab a wooden board (or even a piece of cardboard), some nails, and colorful string. Hammer the nails into the board in the outline of your chosen design (a heart, star, or even your initials—go wild!). Then, wrap the string around the nails in a random yet artistic fashion.
The result? An eye-catching piece that’s sure to be a conversation starter. It’s like playing cat’s cradle, but way more satisfying and utterly wall-worthy. Plus, it’s the perfect way to use up that extra yarn from your last knitting project (we all have that stash, don’t lie).
4. Washi Tape Wall Decals

Washi tape. If you don’t have a drawer full of these colorful sticky wonders, are you even living? Use this versatile tape to create fun patterns directly on your wall. Think geometric shapes, stripes, or even an entire cityscape if you’re feeling extra ambitious. The best part? Washi tape is easily removable, making it perfect for renters or commitment phobes.
Invite your friends over for a washi-tape wall party, and let the creativity flow. Who needs wallpaper when you’ve got a tape that can be repositioned more times than a reality TV star can change their hair color? It’s fun, it’s fresh, and it’s definitely a budget-friendly way to jazz up any space.
5. Fabric Wall Hangings
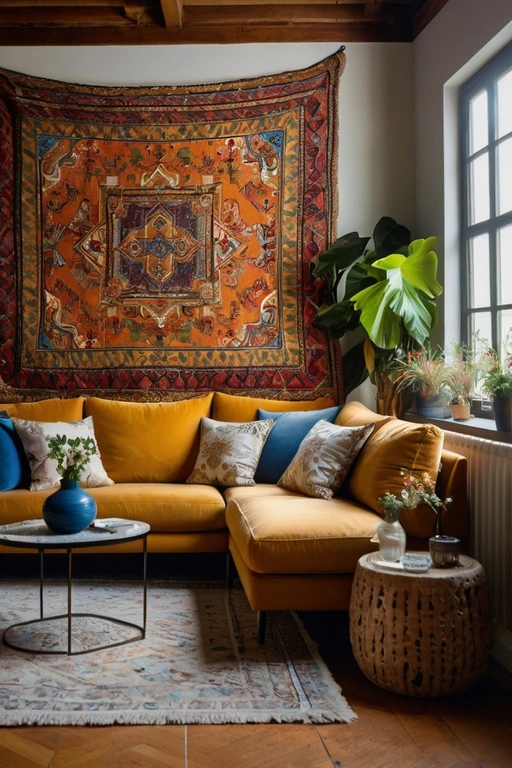
Got some leftover fabric from a previous sewing project—or a bed sheet that’s seen better days? Transform it into a stunning wall hanging! Stretch the fabric over a wooden dowel or a piece of driftwood, securing it with hot glue or staples. Add some decorative tassels or fringe to the bottom for that extra boho-chic flair.
Hang it up, and watch as your room instantly gains texture and warmth. It’s like giving your walls a cozy blanket hug. Plus, it’s a fab way to repurpose old fabric and keep things eco-friendly. Double win!
So, there you have it—five budget-friendly wall art DIYs that’ll make your space look like a million bucks, without actually spending a million bucks. Grab your supplies, put on some upbeat tunes, and get crafting. Your walls (and your wallet) will thank you!


